Yo, wanna kick start a blog on WordPress like a boss?
Starting a blog might sound scary, especially if you ain’t tech-savvy. But hey, you’re not alone, dude!
After helping loads of peeps set up their blogs, we’re dropping a sick guide on how to start a blog on WordPress from scratch, even if you’re clueless about tech stuff.
In this epic guide, we’ll walk you through every step. Plus, we’ll dish out tips on how to make your blog pop and grow like crazy.
It’s super easy, whether you’re a kid or a grandpa. But if you’re stuck, no worries, I got your back. Hit me up for free blog setup help! Click here to get your free help to make a blog WordPress setup!
In this cool post, we gonna walk you through the steps you need to make a top-notch blog on WordPress. Or, if you’re more into videos, check out this awesome walkthrough made by Hostinger!
Easy steps to a fantastic Blog! Allow me to assist you.
What’s next?
Grab Your Coffee, And Let’s Go!
What do you need to start a blog on WordPress?
Okay, so it seems like you’re diving deep with me!
So, first things, you gotta invest in some strong hosting, you know, the fast and secure kind, and most importantly, you gotta get top-notch support ’cause you’ll hit some bumps along the way. After that, it’s all about following these steps:
- Think about a field you’re good at or interested in.
- Set up your domain name and hosting provider.
- Install WordPress.
- Choose your theme, whether it’s free or paid.
- Add your basic pages to your website.
- Customize your website, like colors, fonts, and fitting content.
- Install some plugins, and lemme tell you, there are loads of free ones out there.
- Optimize your website for speed and security against attacks.
- And finally, start writing by saying Hello To The World.
Need some free help to run your blog on WordPress on a tight budget or get advice on the right hosting provider for your needs? Click here! To reach out to me directly.
Selecting a Hosting Provider
Okay, so first things first, it’s super important to have your own special place for your blog, ya know? Like, your own little corner where you can keep all your stuff like pics and articles and show them off to the world. It’s called hosting. It also makes sure your blog is safe and works well with WordPress or whatever.
So, there are loads of hosting platforms, but I’m gonna point you to Hostinger ’cause it’s one of the best 5 hosting Powerful. Plus, it’s got an easy interface and really good support, and it even supports AI.
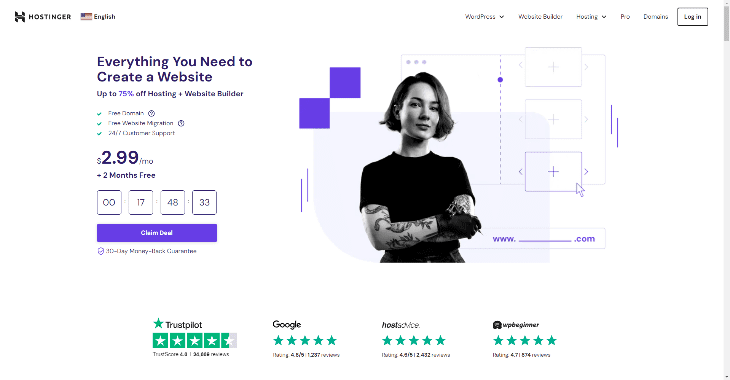
Why should you go with Hostinger, you ask?
Well, maybe you’re looking for a good host at first, but not one that’s gonna empty your pockets, right? That’s what I thought too.
So, with Hostinger, it’s the king in this case. Prices start at $2.99 a month if you choose 4 years. Or $11.99 for just one month. Plus, you can get your money back within 30 days if you’re not into it.
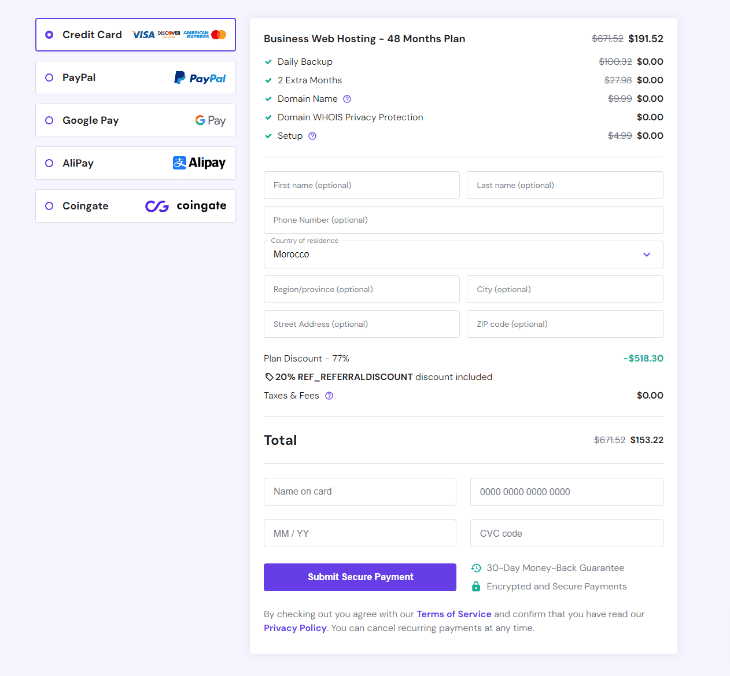
And I also suggest a 20% discount on plans starting from a year or more. Let’s take the suggested plan for example, at $3.19 a month without the discount. Usually, it would be $191 for 4 years. But with the automatic discount from Techmim, it’ll be $153 for four years. Or less for other plans or months.
Now let’s move on to the subscription steps.
- Visit Hostinger
- Pick Your Perfect Plan
- Choose A Period Specific
- Create Your Account On Hostinger
- Review And Click On Secure Payment
Step 1: Visit Hostinger by clicking here to get a 20% discount.
Get A 20% Discount Now!
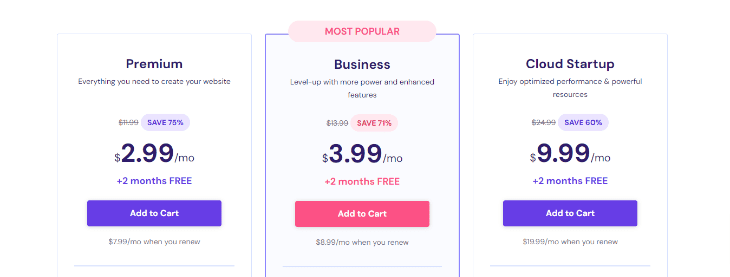
Step 2: Read about the features of each plan, then choose what suits your needs. All plans have discounts ranging from a year to four years, but not for just one month. Think of it as a long-term investment.
Step 3: Choose your commitment period, a month, a year, two years, or four years. Note that the longer the duration, the lower the price, plus a free domain for a year, which you can renew for $15.99 annually.

Step 4: Create your account on Hostinger, you can choose between regular registration or through a third party like Google or Facebook. Choose your favorite and most used one.

Step 5: Finally, review the invoice and discounts, including the 20% discount provided by Techmim. Then choose the most suitable and preferred payment method. Fill in all the data and then click on secure payment.
Congratulations, now you have ready hosting. You will receive an email for confirmation after you write the password.
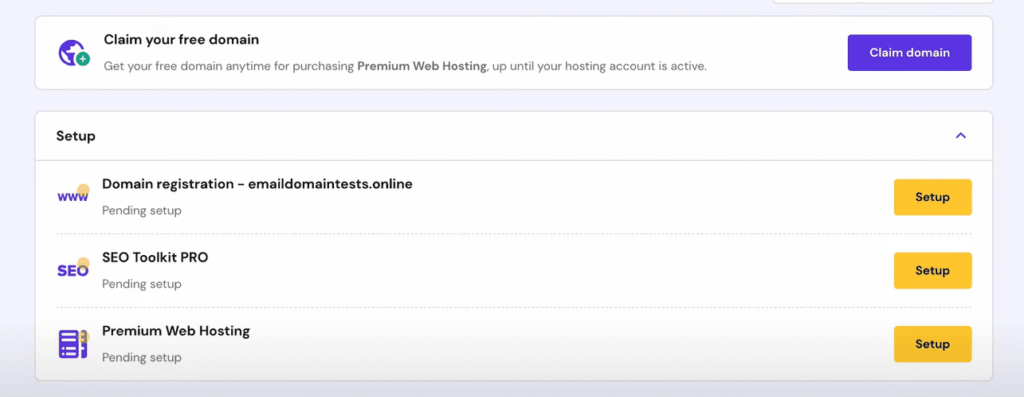
But now. You will go directly to the main page on Hostinger. In order to set up a domain name to start a blog on WordPress.
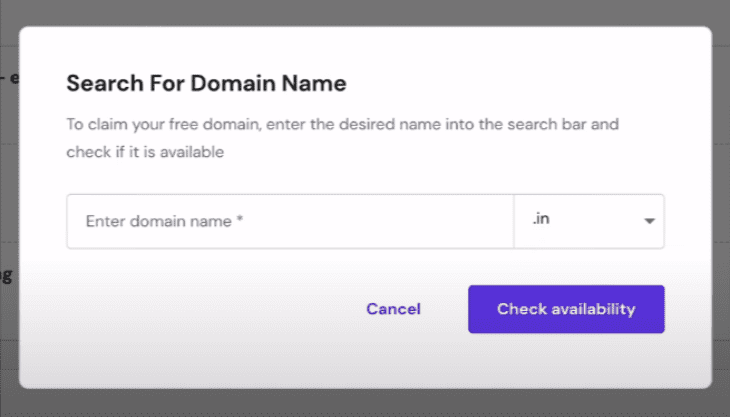
So click on claim domain.
Now, type a domain name that suits your blog, it must be available, and don’t forget to switch “in” to “com” or “net” or a country code if available. But most people choose “.com”. Click on “in” and other options will appear. If you’re not sure about your choice, read this article by clicking here.
Now is the time to enter your basic information and your contact information. Fill in each box as requested. And click on finish.
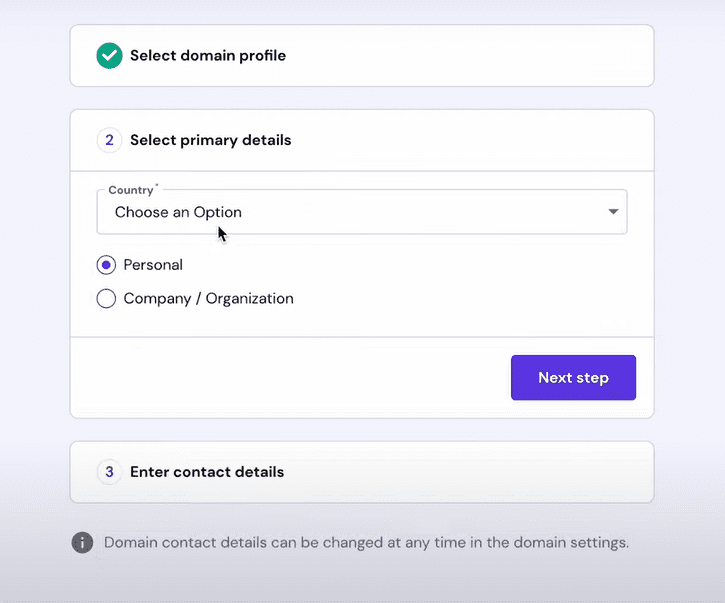
Finally. Click on complete. And congratulations to you.
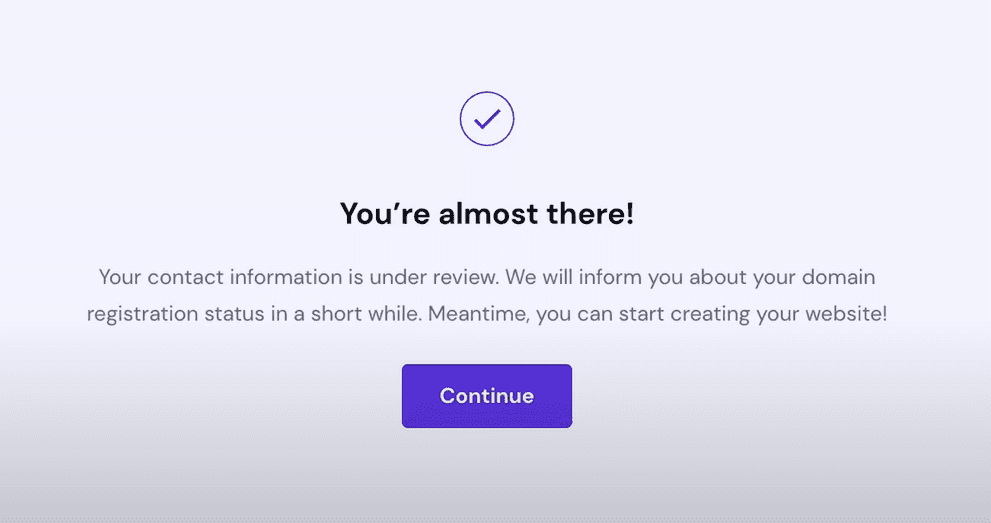
And don’t forget, the first domain is free for a year if you choose a year or more. and you can register 100 to 300 sites on hosting. That depends on your plan type, so you’ll need a different domain for each site, and this time you’ll pay.
So, that’s what we’ll talk about later. Leave your thoughts, and any problems in the comments, or contact me for free help.
Register Domain Name
So like, say you got some free space from Hostinger. But now you’re thinking about buying a new space for your blog or maybe you wanna start an online store. What should you do?
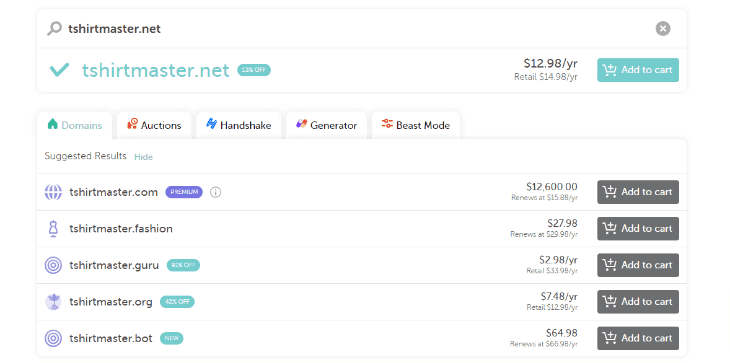
It’s pretty simple, so just think about a name that reflects the main topic that you wanna start with. Like, an online store for printing shirts on demand. What would you name it? I guess you might think of “customtshirtprintingmaster.net“.
But nah, don’t fall into that trap. so instead make your domain, short and easy for the audience to remember. and it reflects the theme of your blog or online store. Like, think of “tshirtmaster.net“.
The things you gotta follow:
- Clear and reflects your brand’s theme.
- A short domain name or less than 15 letters.
- Choose a relevant keyword related to your topic.
- Choose .com .net .co primarily.
- Register the appropriate domain name as soon as possible.
Things you gotta avoid:
- Complex spellings that confuse visitors.
- Mixing numbers with letters or symbols (letters only).
- A long domain name or more than 15 letters.
- A domain name with no meaning.
- Avoid resembling another brand.
- Negative or offensive domain name.
Now you might be thinking about what the domain name is and what its benefit is. Or a flood of questions, so if you’re interested in delving deeper into the technical stuff. You should click here, you’ll be directed to another article that includes technical details.
now to move on to the steps for registering your domain.
- Go To Namecheap
- Register Name Domain
- Select Years & Confirm
- Create Account On Namecheap.
- Dictation Of Information & Payment
Step 1: Go to a domain provider like Namecheap or GoDaddy. In the pictures, I’ll show, Namecheap as it’s popular and I’ve used it in my projects too. Because of its cool features and ease of use. Plus, many options.
Go To Namecheap Now!
Step 2: Write a distinctive domain name, it should be available for purchase. And don’t forget to apply the things I mentioned earlier for a distinctive name, you’ll likely get a domain name mostly priced at 9 to 13 dollars. And that’s considered cheap for your site to appear on the internet.
Step 3: For this stage, you’ll only choose the number of years you want to commit to and protect your domain name. Then confirm your order.
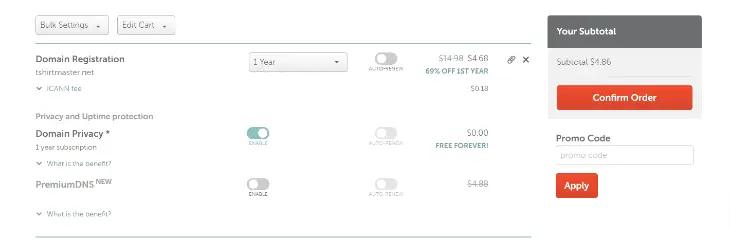
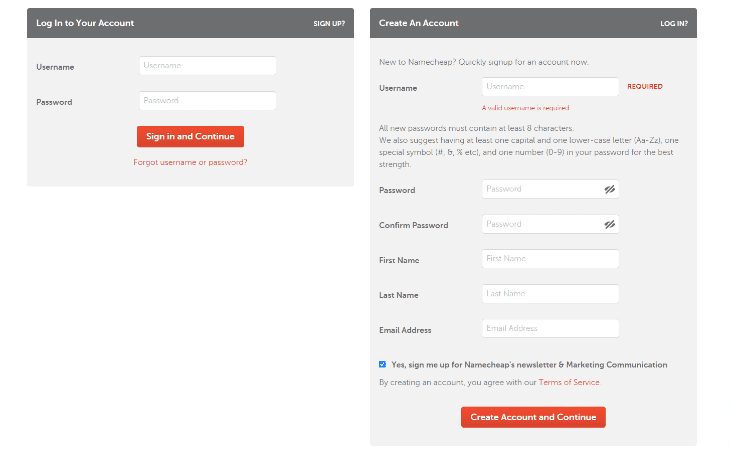
Step 4: Create your account with Namecheap. Also, make sure to choose a strong password consisting of numbers, symbols, and lowercase and uppercase letters. and most importantly remember it in a safe place, for reference when needed.
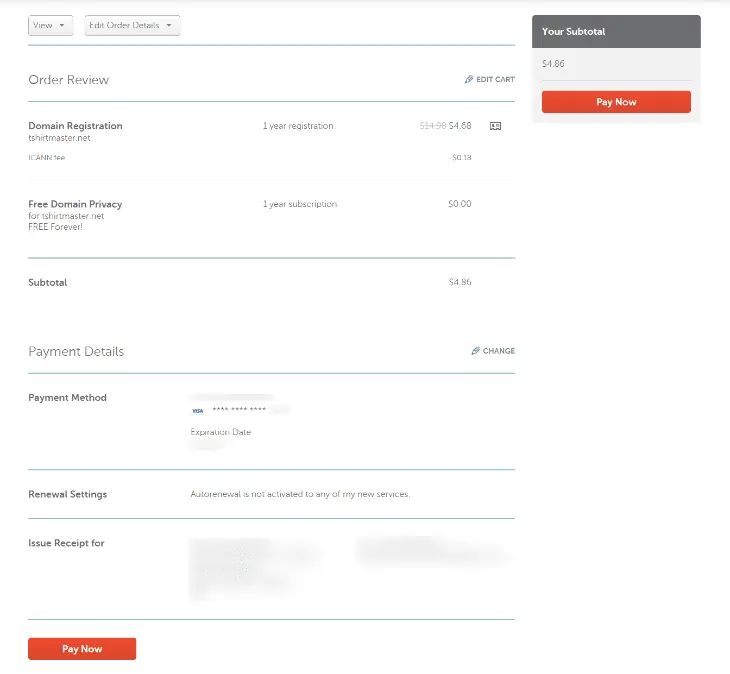
Finally, review the prices, then fill in the payment information in every empty box asked of you. And click on Pay Now. The amount will be deducted from your card directly. So make sure to review the prices and the total before payment.
Alright, now you’ve covered some key steps to start a blog on WordPress and this will make you feel some of the adrenaline running through your veins. Keep your excitement because the next steps ahead will start discovering some of the initial results. Be prepared.
Install WordPress
So, now that you’ve got your own hosting and a cool domain ready to roll. Your next step to start a blog on WordPress is to download and set up WordPress. Like, you know, WordPress is this super awesome platform for managing your site’s content like a boss, with zero restrictions. It’s like the go-to for bloggers, man. Plus, it powers over half of the websites out there on the internet!
Since you’re all hooked up with Hostinger now, installing WordPress is gonna be a breeze with just a few clicks, dude. It’s kinda similar to any hosting provider, ya know.
So here’s your basic steps to install WordPress
- Log into your Hostinger account.
- Click On ‘Manage’.
- Select Auto Installer.
- Choose Between WordPress & WooCommerce.
- Give Your Blog A Name And Setup Login Deets.
- Updates & PHP Version.
- Activate SSL.
Step 1: Log into your Hostinger account. Everything’s gonna be crystal clear from there, bro. You probs went through the domain registration phase in the last round when you first signed up.
Step 2: On the homepage, head over to the hosting area. Then click on ‘Manage’.

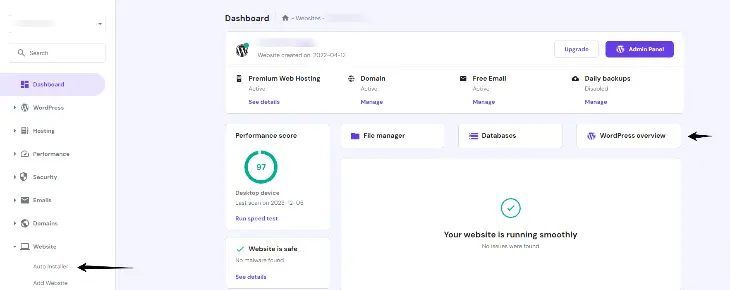
Step 3: Go to the sidebar menu, hit up “website,” and then click on Auto Installer. Or just hit up the first button with the arrow. You’ll find ‘Auto Installer’ instead of WordPress Overview.
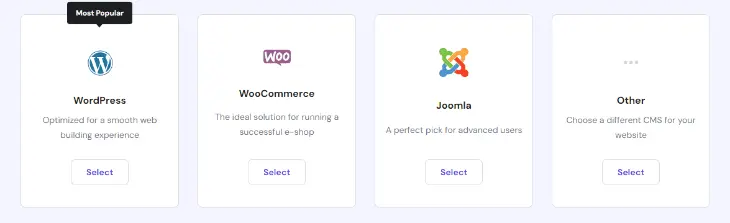
Step 4: Choose the box with WordPress to start a blog or business site. If you’re thinking of starting an online store, select WooCommerce, which is like a WordPress add-on for e-commerce support.
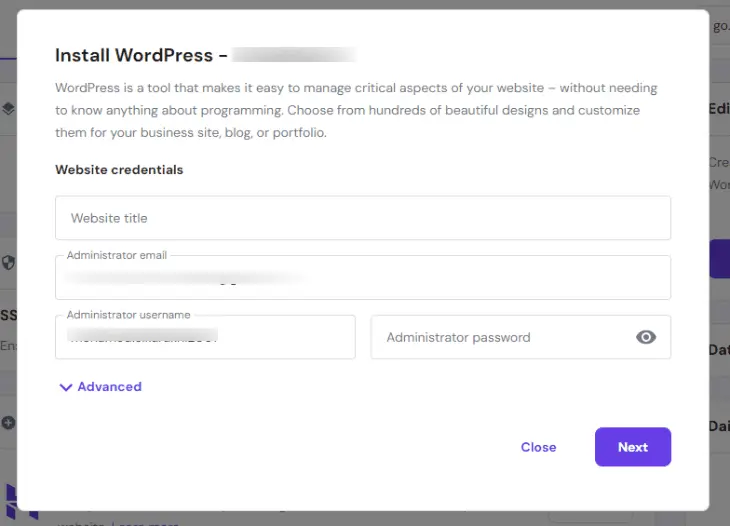
Step 5: Give your blog a catchy name, easy to remember, and it should match your domain name. Then, enter the email you wanna use for management, probs your own email. Finally, enter your log in deets, like your admin name and password for accessing the WordPress dashboard.
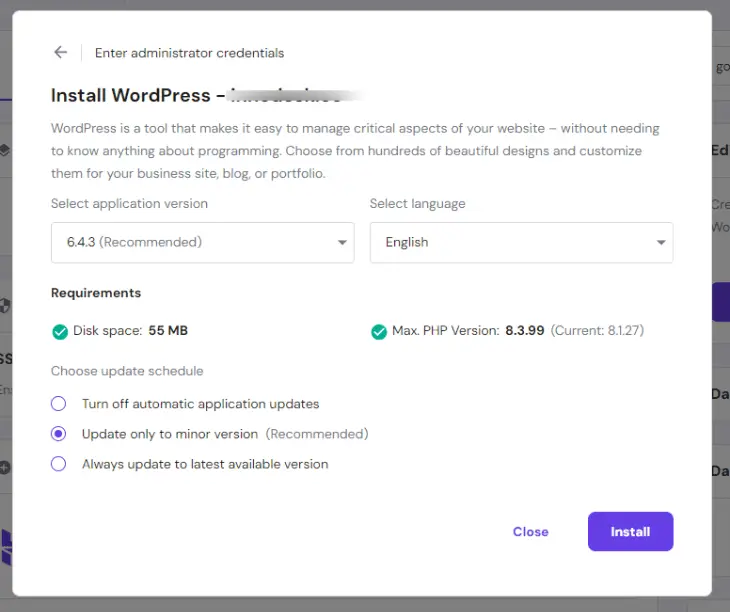
Step 6: The tech settings for updates and the PHP version. But, like, don’t change anything except for the language of the control panel, then hit install.
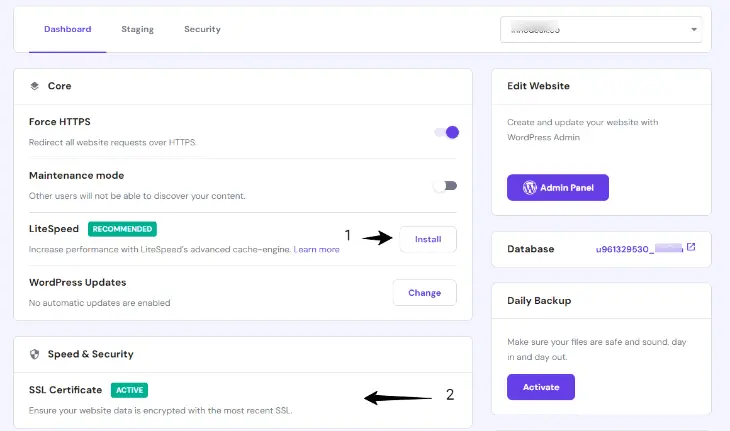
And boom! You’ll see this almost picture-like interface, so you gotta click install next to the number one arrow to boost your blog’s performance. And if the area where arrow 2 points is inactive, hit up the button that pops up, saying install or activate. This step’s crucial for securing your site from attacks and making it reliable, ya know?
By following all these steps right, you now have a WordPress dashboard, and there are more steps to start a blog on WordPress.
So yeah, I’ll remind you again about that free help offer. If this stuff’s kinda confusing for ya, I’m here to help with all the cheer. Or drop a comment letting me know how easy-peasy the explanation was this time around.
Install WordPress theme for your blog
It’s time for some digital attraction! That means installing a cool WordPress Theme, Attractive and fast. Your website’s interface is super important to make a good first impression on potential visitors.
So, you gotta think hard and search well. Whether it’s looking for free WordPress themes or paid ones from platforms like Themeforest or Template Monster. Both these platforms rock with selling the best WordPress themes, Shopify themes, and HTML templates. Plus, more cool digital stuff.
You gotta follow these easy steps to install a free theme. It’s easy peasy. I’ll even download a paid theme from Themeforest. It’s worth it because paid themes have more cool features and perks for creators. But hey, it’s your call, I’ll explain both ways.
Install Free Theme
- Click ‘Add New Theme’.
- Choose Theme & Install.
- Select Auto Installer.
- Select Install Starter Templates.
- Build With AI Or Templates.
- Choose A Unique Template.
- Install The Template And Continue.
To add a free theme, click on “Appearance” then hit “Add New Theme”.
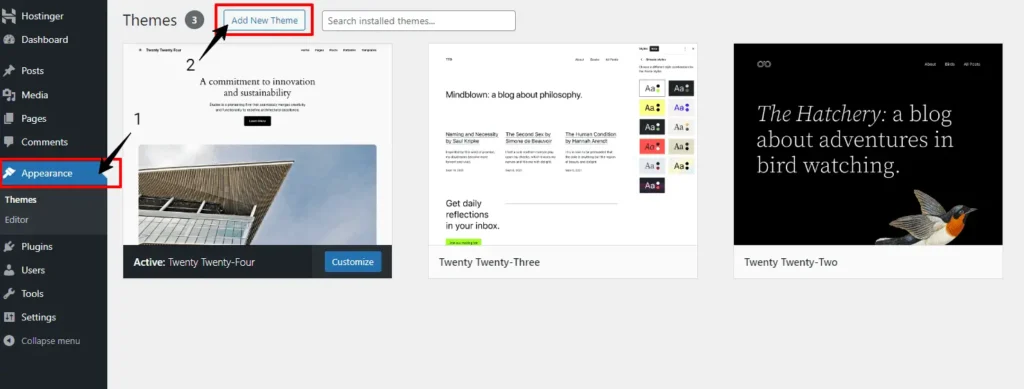
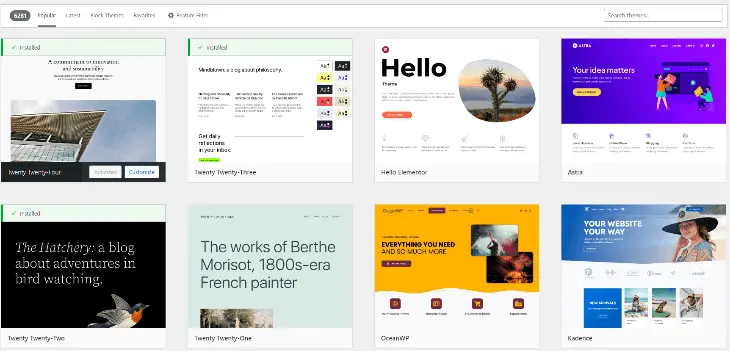
Choose from over 6281 free themes. Astra and Hello Elementor are among the best free WordPress themes. You can rely on them to start a WordPress blog.
When you find the right theme for you, click Install, wait for 10 seconds, and click Activate.
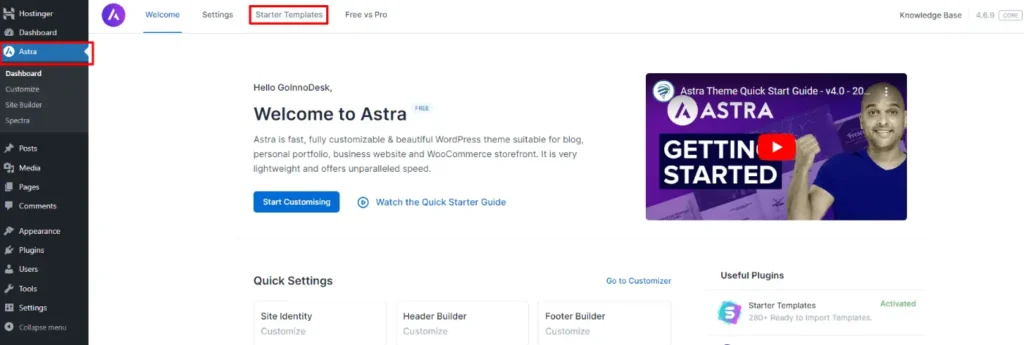
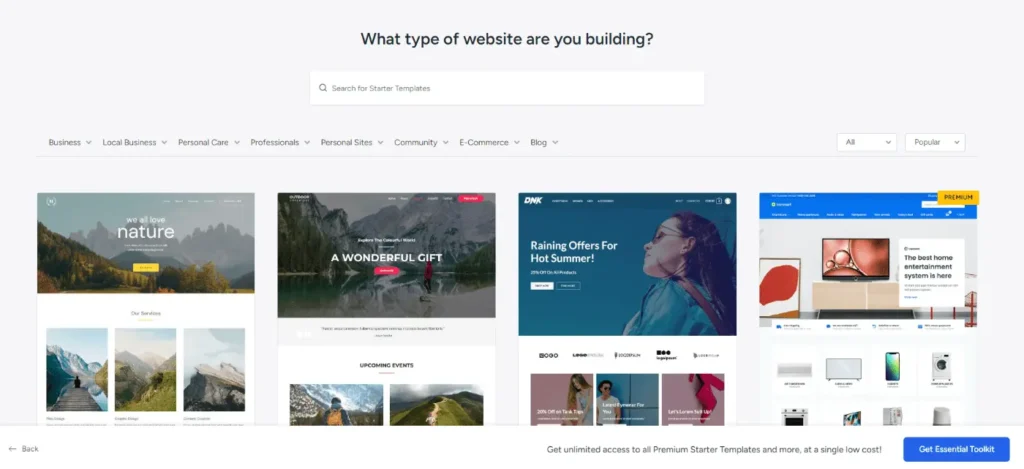
After activation, you’ll see the interface for installing the template that’ll show how your new blog will look. Click on Starter Templates.
If the template installation interface doesn’t show up, go to Astra in the sidebar and click on “Starter Templates”. It’s shown in the picture.
Choose to build with templates. Or you can try building with IA. I’ll go with the ready-made templates.
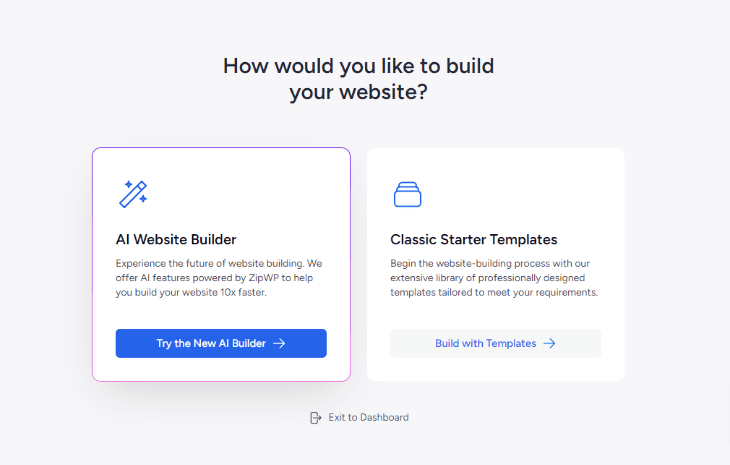
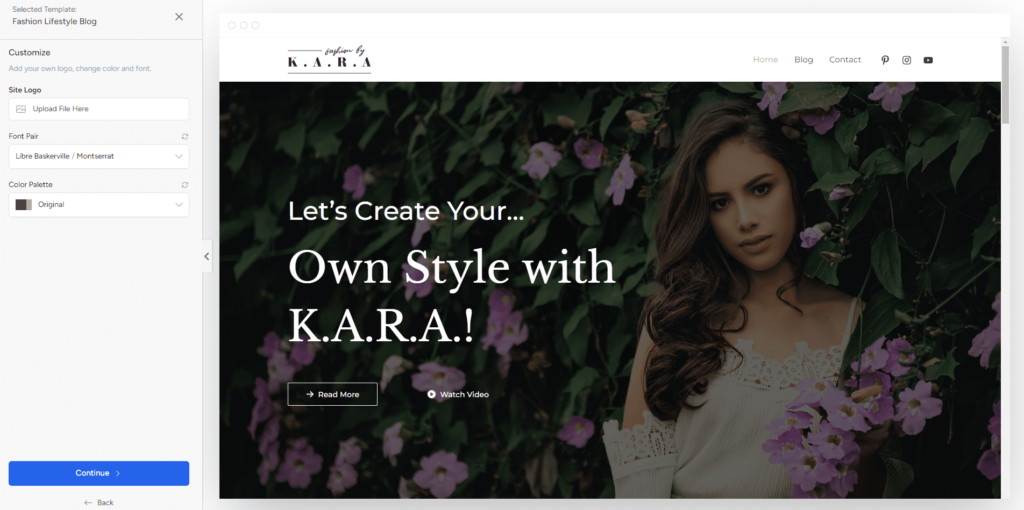
Now, take a look at all the templates. Notice there are both paid and free templates. Choose the free template you like and click on it.
You’ll need a good logo for the blog, add it if you have one, if not just click continue. You can replace the logo later.
Enter information about yourself. and click submit.
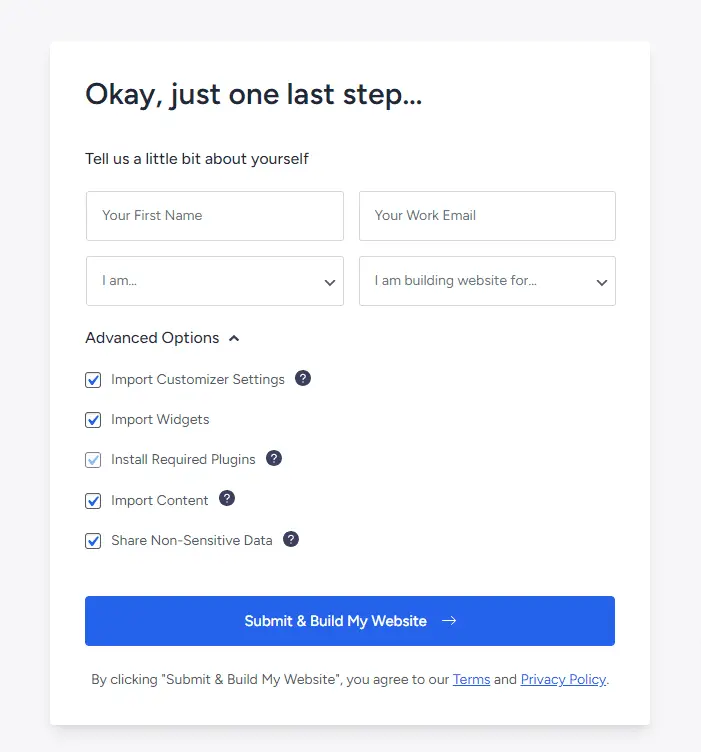
And finally, your website is ready, just add content that suits your blog and main topic. So click on View Website or go back to the dashboard.
Ya’ll better hold on to yer hats ’cause there’s a second part comin’ up real soon on ‘How To Start A Blog On WordPress.’ Hang tight, folks! Meanwhile, if ya got any questions, shoot ’em our way, and we’ll get back to ya in the next update, keepin’ ya in the loop.
Other articles

Mohamed Elkarakhi
April 1, 2024How To Start A Blog On WordPress [The Best Tutorial]
Yo, wanna kick start a blog on WordPress like a boss? Starting a blog might sound scary, especially if you ain’t tech-savvy. But hey, you’re not alone, dude! After helping loads of peeps set up their blogs, we’re dropping a sick guide on how to start a blog on WordPress from scratch, even if you’re […]